


Stepping into the world of at-home waxing promises smooth skin without the salon appointment—but how well do these kits really perform once you unwrap them? From sticky mishaps to surprisingly sleek finishes, we put several popular at-home wax kits to the test, carefully measuring both the mess factor and the end results. Whether you’re a waxing veteran or a curious first-timer, join us as we uncover which kits deliver a clean, effective experience and which ones leave more to be desired.
Choosing the Right At-Home Wax Kit for Your Skin Type
Picking the perfect wax kit begins with understanding your skin’s unique needs and sensitivities. For those with sensitive or dry skin, opting for wax formulas enriched with soothing ingredients like aloe vera or chamomile can reduce redness and irritation post-waxing. Conversely, if your skin tends to be oily or prone to blemishes, look for kits that offer a lighter, non-comedogenic wax to avoid clogging pores. Remember, a product that “melts” gently at lower temperatures is ideal for delicate skin, minimizing discomfort and the risk of burns.
Below is a quick reference table to help match your skin type with the ideal wax kit features:
| Skin Type | Recommended Wax Type | Key Ingredient | Wax Temperature |
|---|---|---|---|
| Sensitive | Soft Wax | Aloe Vera | Low |
| Oily | Hard Wax | Tea Tree Oil | Medium |
| Normal | Soft or Hard Wax | Vitamin E | Medium |
| Dry | Soft Wax | Shea Butter | Low to Medium |
Additionally, consider your pain tolerance and hair type when choosing. Hard waxes can be less painful and are particularly effective for coarse hair, while soft waxes are better for fine hair and larger areas. Don’t underestimate the importance of proper aftercare included with the kit—products that come with post-wax soothing balms can make a noticeable difference in maintaining smooth, happy skin.

Evaluating the Mess Factor: What to Expect During and After Application
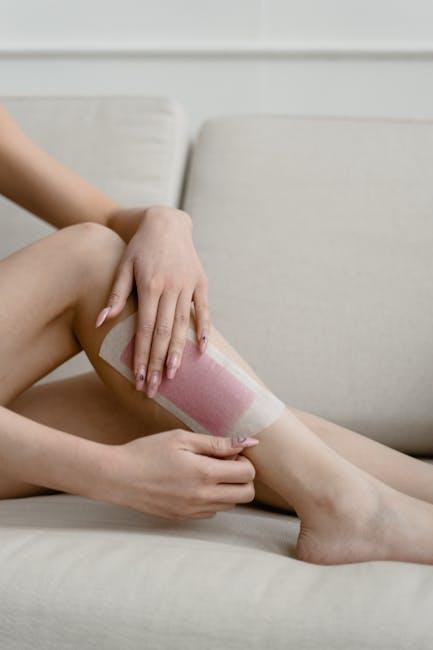
The moment you dip your spatula into the warm wax, prepare for a bit of a sticky adventure. While most kits come with clear instructions aiming to minimize mess, the reality is that wax has a mind of its own—especially if you’re new to the process. Expect some drips, slight smudges on your skin or surfaces, and perhaps a little bit of wax stranded where it shouldn’t be. Prepping your area with old towels or newspaper is a smart move to contain the chaos. Also, having baby oil or a dedicated wax remover close by can save you precious time when it’s cleanup o’clock.
After pulling the strips, the mess factor doesn’t just vanish. Residual wax clinging to skin can feel uncomfortable and often requires a gentle touch to remove without causing irritation. Here’s a quick look into the typical aftermath:
| Type of Residue | Recommended Removal Method | Expected Cleanliness Level |
|---|---|---|
| Sticky wax patches | Baby oil or wax remover | High |
| Powdery leftover dust | Soft cotton or towel wipe | Medium |
| Skin oiliness | Warm water and mild soap | Low |
- Be patient: Cleanup takes a few extra minutes but is crucial for the final smooth feeling.
- Avoid harsh scrubbing: Sensitive skin benefits from gentle care post-wax.
- Plan ahead: Wearing loose clothing post-application helps prevent wax rub-off and irritation.

Comparing Results: Smoothness, Hair Removal Efficiency, and Longevity
When it comes to smoothness, the variance between kits was noticeable. Some kits left skin feeling impeccably soft, almost silk-like, while others had a slightly rougher finish, likely due to incomplete wax removal or stubborn residue. Kits that used a softer wax formula generally delivered a smoother glide during application, which translated into a cleaner strip pull and less irritation. Efficiency in hair removal also varied; while most kits captured the majority of hairs in the first strip, a couple required repeat pulls, which could increase discomfort and skin sensitivity. Key factors influencing efficiency included wax temperature control and strip quality.
- Smoothness: Soft wax kits consistently outperformed hard wax variants on delicate skin.
- Hair Removal Efficiency: Kits with pre-cut strips reduced the need for reapplication.
- Longevity: Results generally lasted between 2-4 weeks depending on hair growth cycles.
- Aftercare: Some kits included soothing agents that enhanced skin recovery.
| Kit | Smoothness Rating | Removal Efficiency | Longevity (Weeks) |
|---|---|---|---|
| SilkTouch Pro | 9/10 | High | 3-4 |
| QuickStrip | 7/10 | Medium | 2-3 |
| EasyWax Deluxe | 8/10 | High | 3 |
| PureGlow Natural | 6/10 | Medium | 2 |
Longevity was another critical aspect of the results, impacting the overall value of each kit. Those with higher smoothness and hair removal efficiency also tended to maintain bare skin longer, reducing the frequency of waxing sessions. Interestingly, kits that included nourishing oils or calming extracts not only enhanced skin feel but contributed to prolonged hair-free intervals by minimizing ingrown hairs and irritation. In contrast, some budget options required more frequent maintenance, which could quickly add up in cost and effort.
Expert Tips for Minimizing Mess and Maximizing Results at Home
When taking on an at-home waxing session, preparation is your best ally. To keep mess at bay, always work on a smooth, non-porous surface—think a bathroom counter with a washable mat underneath. Warm the wax just enough to reach a honey-like consistency; overheated wax tends to drip uncontrollably, creating an inevitable cleanup nightmare. Using a wooden spatula that’s slightly wider than the strip you plan to apply helps avoid overlap and unwanted spills. Keep some baby wipes or warm towels handy for quick cleanups and to smooth over any wax residue left on the skin.
Efficiency and results hinge on technique:
- Apply wax in thin, even layers for better adherence without dripping.
- Remove strips swiftly in the opposite direction of hair growth to maximize hair removal and minimize irritation.
- Stretch the skin taut with one hand while pulling the strip with the other to reduce pain and prevent wax from breaking.
| Tip | Impact on Mess | Impact on Results |
|---|---|---|
| Use a thermal warmer | Minimizes drips | Smoother wax consistency |
| Prep skin with talc | No stickiness outside target area | Better wax adhesion |
| Remove strips fast | Less residue left behind | Effective hair removal |
Key Takeaways
After rolling up our sleeves and braving the sticky strips, it’s clear that at-home wax kits offer a mixed bag of experiences. While some delivered surprisingly smooth results with minimal mess, others left us reaching for extra wipes and a sense of caution. Ultimately, if you’re up for a little trial and error, these kits can be a convenient option for DIY hair removal—but don’t expect a salon-perfect finish every time. Choose your product wisely, prepare thoroughly, and embrace the imperfections along the way. Your skin—and perhaps your floors—will thank you.
